I couldn’t find any instructions/videos/manuals on how to assemble and disassemble this multi-tool. But I needed one because it was already starting to rust.
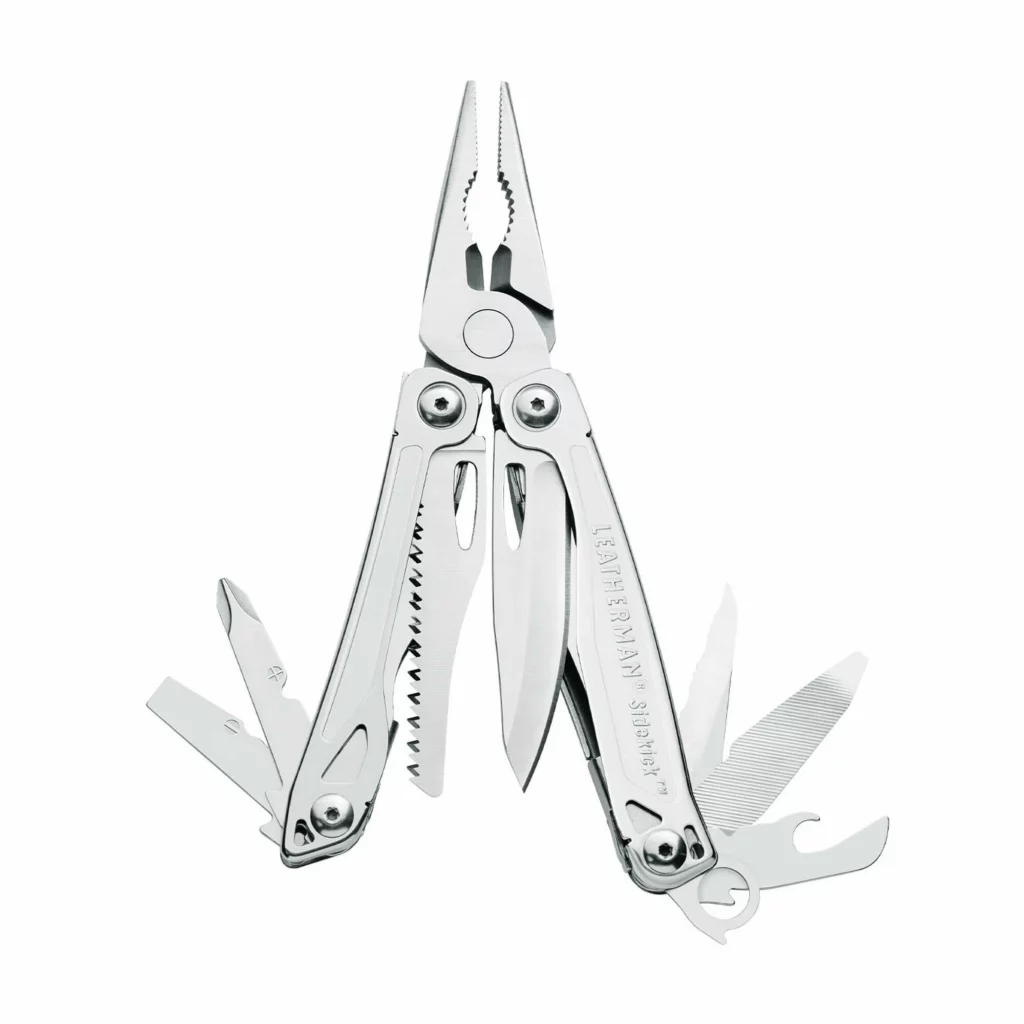
For reference we will use an image from the official leatherman website

Let’s call the left side the one with the Phillips and slotted screwdriver inside. The right side is the one with the file.

https://forum.multitool.org/index.php?topic=66610.0
We start the assembly with the tools in the handle, then we put the pliers, then the knife/saw and close the lid.
Left side assembly
Assembling the lower part
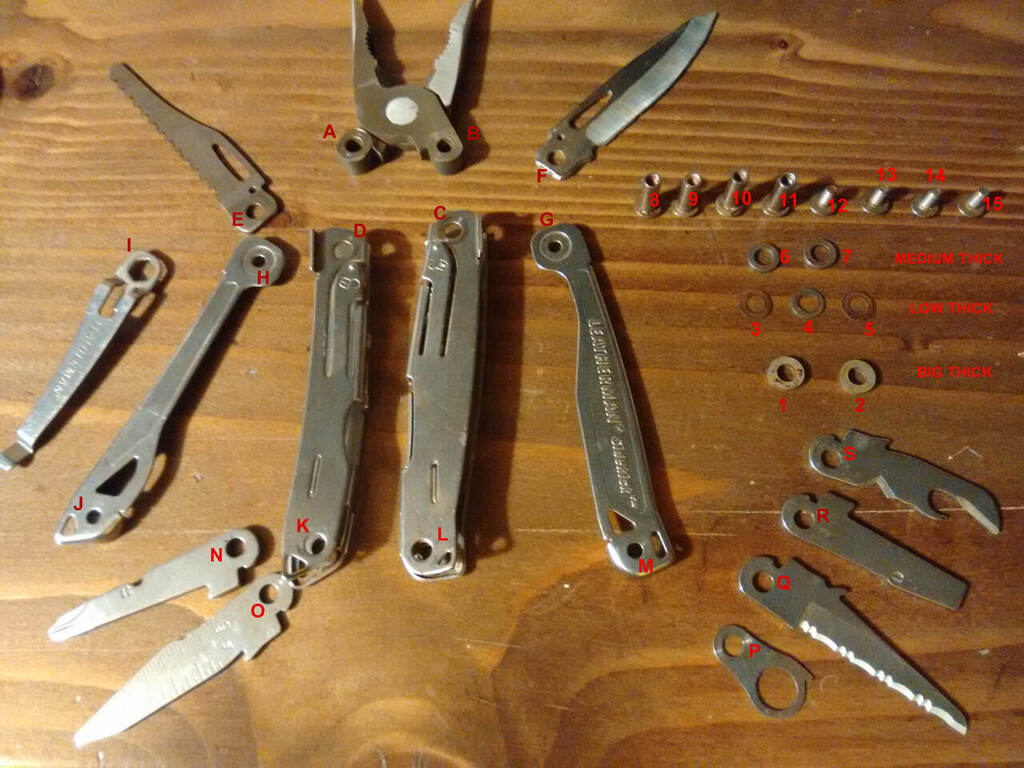
- Spacer (4) -> Slotted screwdriver (R) -> Phillips screwdriver (K)
- On the opposite side from the saw lock, insert the guide (8) into the hole (K)
- We put the tools from point 1 on the guide (4-RK)
- A plastic spacer (1) is placed on top of the guide after the handle.
- Then the J-cover is put on and tightened with a 12 bolt.
Assembling the upper part
- Insert the guide (9) into the hole inside the handle on the opposite side from the saw lock.
- We put the spacer (6) on the guide inside the handle.
- We insert the pliers with the hole A inside the handle and push the guide
- A copper spacer (3) is placed on top of the guide after the handle, then a saw (E) (with the sharp side to the left)
- It is closed with a cover (H) and screwed with a bolt 13
Assembling the right side
Assembling the lower part
- Knife (Q) -> File (O) -> Bottle Opener (S) -> Ring (P)
- On the opposite side from the knife lock, insert the guide (11) into the hole (L)
- We put the tools from point 1 on the guide. (Q -> O -> S -> P)
- A plastic spacer (2) is placed on top of the guide after the handle.
- Then put on the M cover and tighten it with bolt 14
Assembling the upper part
- We insert a guide with a hexagonal head (10) into the hole inside the handle on the opposite side from the knife lock.
- We put the spacer (7) on the guide inside the handle.
- Insert the pliers with hole B inside the handle and push the guide
- A copper spacer (5) is placed on top of the guide after the handle, then a knife (F) (with the sharp side to the right)
- It is closed with a cover (G) and screwed with a 15 bolt.
- On the back side, a clip (I) is placed on the hexagonal head (10) and screwed with a bolt (unfortunately, it is not shown in the picture, but it is exactly the same as bolts 12 – 15)
Do not tighten it all the way, otherwise the tool will not move. Tighten it so that there is no play, but the tool can be removed freely, then drip some blue thread locker onto the thread